Unity 4.6 UI Tip: UI Animation
Posted on 2014-11-07 by marconiusThe single most obvious change made compared to the way Unity previously did GUI is the fact that every UI element is now a GameObject; compared to the old OnGUI() code-based UI, this has the obvious effects of making things significantly easier to oversee, maintain, and to add new elements and set up their relationships precisely; but one happy side effect is that because everything is now a GameObject, we can use an Animator to create UI animations!
This is briefly explained in the official UI Button tutorial video, specifically for the case of Buttons, which have a built-in transition system using automatically generated Animator Controllers. There is no reason why you can’t do the same in the general case, however, and here is how:
Animate using state transitions
The simplest form of animation is transitioning between two states, which have no animation on their own.
First, we’ll need an Animator component; the Animator can apply changes to the GameObject it’s attached to, or any child of it, so we need to choose where to put it accordingly. The Animator will then require an Animator Controller, which we need to create in our Assets.

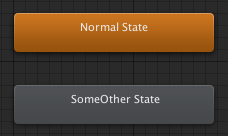
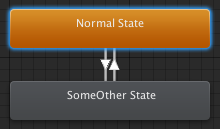
Now we open the Animator window, and click on our newly created Animator Controller. We now need to create all the states we want to use; we’ll add transitions to them later, so for now:
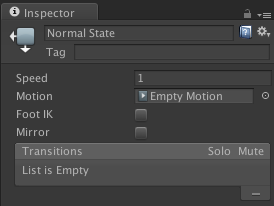
Each state now requires a motion (Animation) attached to it, so we create one for each. Even if we intend to use the basic properties of the object in a state (usually the default state), we should still make an empty motion for it, because otherwise we won’t be able to define transitions.
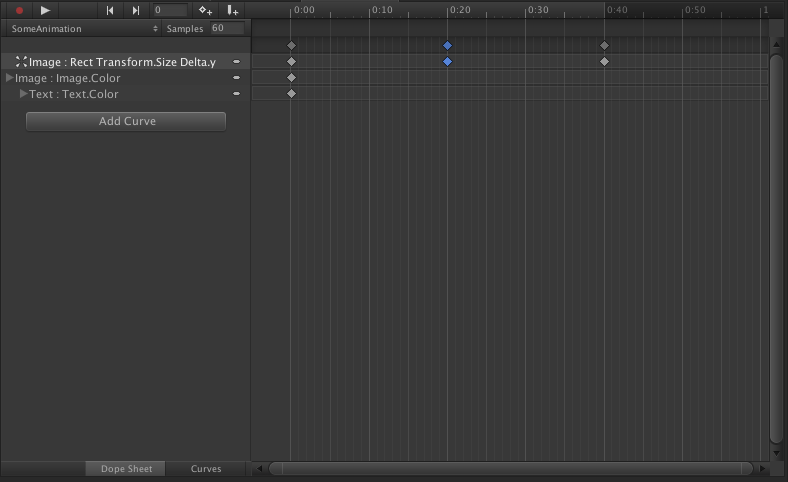
Let’s set up out Animations then: we’ll keep the one on the default state empty, but we want some changes to happen in the other one. We open the Animation window, then in the Hierarchy we select the GameObject we attached the Animator to; in the Animation window, in the top left, we select the state we want to change, then simply click the record button (the little red circle): after this point, any changes we make in the editor will be recorded and made part of the animation, indicated by a red highlight on the property.
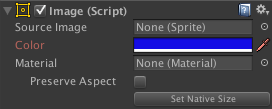
For example, we can change the color of an image; when possible, the transition we later create will actually change over time from the previous value to this one, creating a smooth transition.
We can set pretty much any property here, including positions or scale of objects; we can even change if a Button is Interactable, which comes in handy if we only want a button clickable in certain states; setting it here means we don’t have to bother with it from code.
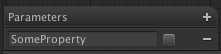
With our states now set up, we should set transitions between them. We want to transition using parameters, which we’ll set from code, so we should define one first:
Then, we right-click on each state and set up the appropriate transitions:
Remember to set the conditions for each transition as well! (At the bottom.)
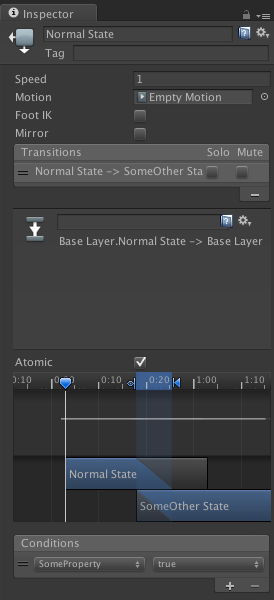
If we properly set up a motion for each state, the settings for the transition should now be visible above the conditions. We can set the highlighted blue area in the middle or slide around the two bars representing the states to fine-tune the time it takes for the transition to complete.
Now all we need to do is call Animator.SetBool(string name, bool value) from code to change our parameter and we’re good to go! Or if we don’t want to make a script, we can test it by changing the parameter directly in the Animator window during Play mode.

Animate within states
What if we don’t want our UI elements to be completely static? Sure, we can transition between two states now, but perhaps in a highlighted state we’d like our button to be flash or displaying some other simple animation. The Animation window can help us here; like before, select the appropriate element in the Hierarchy, then the appropriate state in the top left of the window.
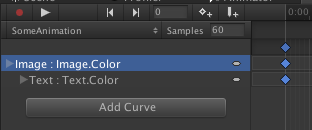
Before, we created only one column of little dots, at 0:00, which meant there was really no animation; these little dots, called keys (as in key frame), are the basic elements of animation. If we want some actual animation, we first need to create a new key at some other point in time; we can do this by right-clicking or simply double-clicking at the appropriate time; then, like before, we can use the record button (the little red circle) to set properties for the key; clicking on a key will also start recording automatically. We can then click the play button (the little arrow) next to the record button to see our new animation in the Game window!
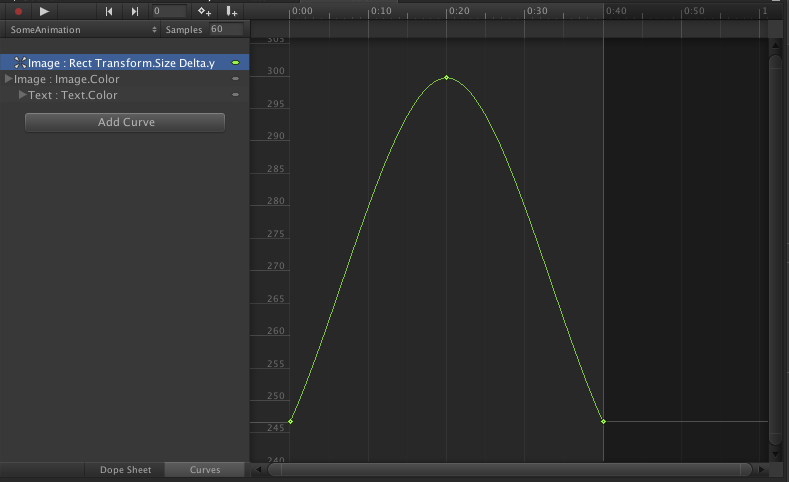
If we want more precise control over our animation, we can click the Curves button at the bottom of the screen. This will bring up a curve generated for each property we’re modifying; we can drag the values of each key here, or double-click to add more keys if we want more precision.
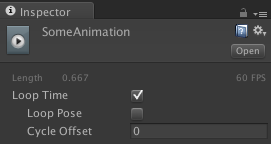
Normally this animation will only play once; if we want it to loop, we can set that up in the properties of the Animation itself:
Of course, this animation and the transition from another state we did before can be used in combination; just be careful that the transition will overlap with the animation defined in a stance, which normally leads to a nice, smooth transition, but sometimes can end up looking odd; we can adjust timings carefully, or even consider adding an extra state (with a 0 time transition) if this becomes a problem.

Created for Unity 4.6 beta version 20.
This post is meant for advanced users; for basic information on the new UI features, please check the offical tutorial videos!